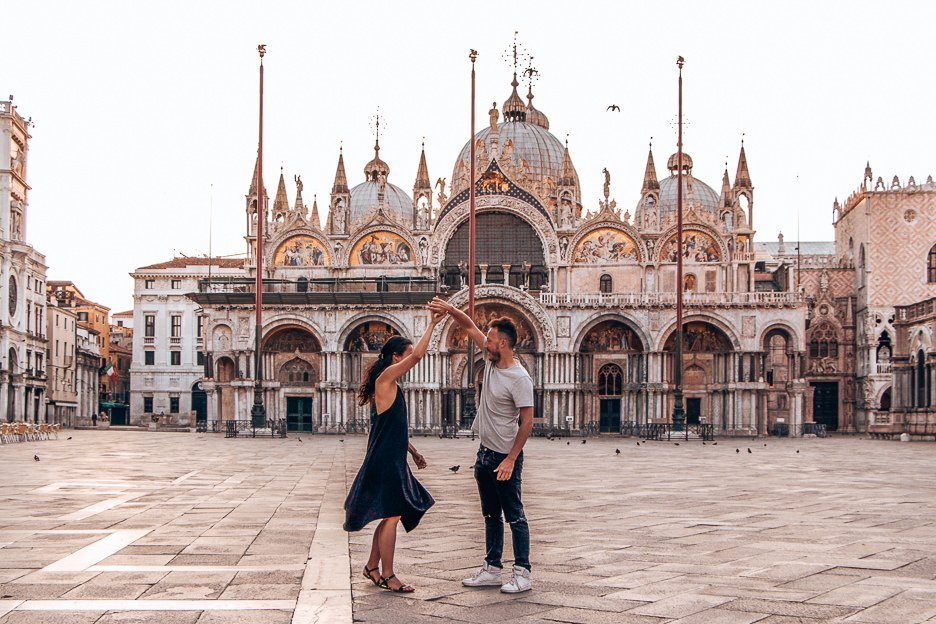
As travellers and keen photographers, we always need to make sure our camera bag is prepped and snap-ready. We are often asked what gear we use to take our pictures so we decided to share all the info about our travel photography kit. This is not a conclusive list and is a constantly evolving representation of our photography interests and skills. We’ve (ahem, Bevan) always got our eyes on the next thing to add to our bag of tricks!
OUR MAIN CAMERAS
Our first Digital SLR camera was a Canon and since then, we’ve always been a part of the Canon family.
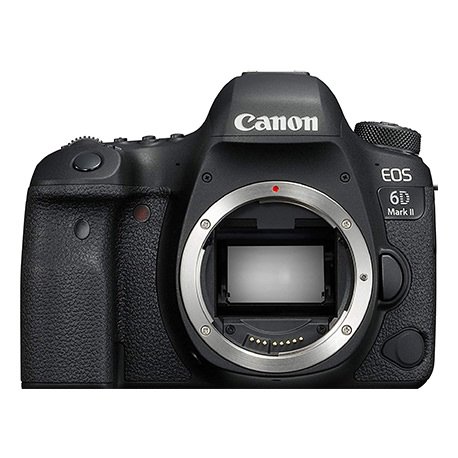
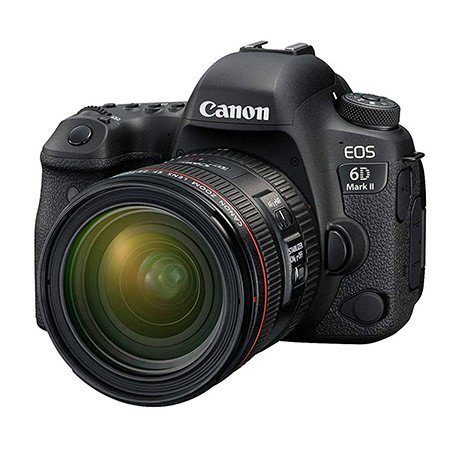
Canon EOS 6D Mark II
Seeking a full frame camera, we opted to purchase the Canon EOS 6D Mark II. Generally speaking, the 6D model is the choice for photography enthusiasts whereas the Canon 5D is preferred by professionals.
Our choice was simply a matter of urgency as our previous Canon 77D took a swim in the ocean and drowned, thus we need a new camera ASAP! We had just returned from Europe and were starting the process of re-building our bank balance, so both budget and required functionality were key factors when considering this purchase.
The 6D gives us most of the performance capabilities that the 5D offers, with those critical features like processor and screen resolution less important to our needs. One day I’m sure we’ll upgrade or replace the 6D with the 5D but until then, we’ll be representing the hobbyists!
Advantages
Full-frame camera, accepting the Canon's EF lens range
Water and dust-resistant
Extended battery life
Wi-Fi
A touch based control with a multi angle screen - great for when we are using the live view mode to take photos of the two of us or the all important flatlay of our food
Disadvantages
When it comes to videography, this probably isn’t the bees knees DSLR camera for this purpose
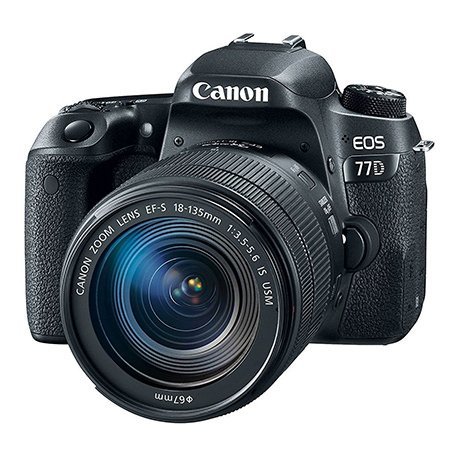
We purchased the Canon EOS 77D in April 2018, upgrading from the Canon EOS 600D. We decided to upgrade for two main reasons:
(1) to capture higher quality images, and
(2) to have a camera with high-performing video functionality. With so much video content produced these days, we hoped to dabble in this area in the future.
The improvement in the quality of our images was instantly recognisable and we believe this is evident in our Galleries. We’re still learning the ropes when it comes to videography but hopefully, we’ll have some videos to show soon!
The camera has built in wifi which we can connect to our iPhones. This is super useful when we want to take a picture together. We set up the camera on the tripod or a flat surface, have the smartphone in our pocket or out of sight and click the trigger when we’re ready – #travelcouple
The 77D has an affiliated app which we have downloaded onto our iPhones. Besides being able to snap photos remotely, the app allows us to download videos from the camera straight to our phone. This means we can quickly go from camera to Instagram.
Advantages
Remote Access - The ability to take photos with our smartphone acting as the remote.
Battery Life - An extended battery life means that the rechargeable battery lasts for approximately 600 shots. For us, we can usually go a whole day without needing to change to the spare battery (we do carry backup batteries just in case).
Autofocus - The 77D has a wider autofocus area with 45 autofocus points in comparison to the 600D which features 9 focal points. Increased autofocus points over a larger area gives you more creative control and results in sharper images.
Disadvantages
Speed - The 77D is a tad slow to process multiple images when shooting in bursts.
Our foray into photography and DSLR cameras began with the 600D. This is a great entry-level camera although sadly it is no longer made. We would encourage beginner photographers to purchase the 600D second-hand or check out the newer model, the Canon EOS 700D. There is enough functionality within the camera’s modes to allow the user to take ownership of the images they are snapping. Users can learn the basic ins and outs of a DSLR camera without feeling too overwhelmed.
As this model is no longer sold, we would suggest a mirrorless camera as a suitable alternative for somebody looking to buy their first camera.
Advantages
Menu Navigation - The 600D features a simple menu structure and several shortcut buttons. Many of the camera’s functions are accessible using the buttons on the camera’s body (e.g. white balance, drive mode and picture style) without having to go into the detailed menu.
Angle Screen - The 600D includes an angle screen which proves to be particularly useful when you want to see what you’re shooting above your head or below your ankles.
Screen Size - The 3 inch LCD screen is a handy size for when you want a quick review of the photo you just took. Not too small so you can scrutinize your work!
Disadvantages
Battery Life - We’ve noticed that the battery life of the 600D drains quickly, particularly when shooting via live view. You receive little warning when the battery is about to run out, often going from two bars to empty within a handful of shots.
ISO Range - The ISO range is relatively limited at ISO 100 to 6400 (it can be increased to 12800), meaning you’ll need to use a tripod if shooting after dusk or when shooting in low-light environments (e.g. inside or in caves).
This was our first and only lens for a while when we started shooting with the Canon 6D Mark II in August 2018.
When we purchased the Canon 6D, we had the choice of two kit lenses. However, we felt that the quality of the Canon 24-70mm, a favourite amongst the Canon EF lens fraternity, would deliver better results. As a zoom lens, the Canon 24-70mm offers the versatility of multiple lenses, allowing us to shoot a variety of settings – landscapes, streetscapes and portraits – making it the perfect companion for a travel photographer. In our opinion, it offers high performance across most situations.
The lens is relatively lightweight at 600g (21.2 oz) which is another big plus. If you’re looking for a lens to join your next adventure, we’d strongly suggest starting with this one.
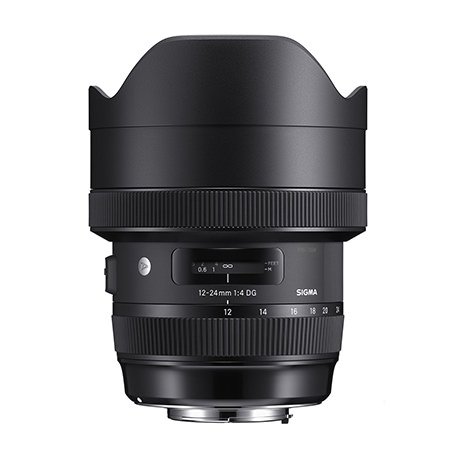
One of three lenses we splurged on (cough cough – that Bevan splurged on) during our trip to Hong Kong. We’d been discussing the addition of a wide angle lens to take our landscapes and streetscape photos for a while and this purchase was one of Bevan’s dreams come true.
We compared the Sigma 12-24mm with the Canon 11-24mm wide angle lens but ultimately, it came down to price. Although we were originally concerned with buying a non-Canon lens, the salesman in the store was very knowledgeable and helpful when it came to making a decision. Choosing the Sigma lens saved us around AUD $1,000 and we haven’t felt that this lens has disadvantaged us during our photography escapades.
Having a wide angle lens in our arsenal helps us to capture, well a wider frame, than the Canon EF 24-70mm and there is the added perk of making Jas’ legs look a little longer (which she is very happy about). On the flipside, some photos require more time in post production to improve their look. When shooting with a wide angle lens, you need to be mindful of your lines and warping of subjects. Luckily, we use Lightroom to process our photos and the Enable Profile Correction tool is a life saver to combat these effects! The other pro tip is to ensure the framing is correct before clicking snap to avoid time and stress during the editing stage.
Lastly, this lens weighs over 1 kilogram, so depending on your other kit items as well as the nature of your adventure (i.e. long weekend cityscape or safari in the wild), you should probably take lens weight and size into consideration.
Small and lightweight! Two big ticks in our books considering we now carry four camera lenses in our photography camera bag.
This lens is quickly turning into our favourite. It’s a fun little lens to take exploring when we choose to leave the camera bag behind.
The Canon 50mm is also our go-to lens for night photography. After purchasing the lens in Hong Kong, we wandered the streets of Mong Kok. We were more than pleased with the results and you can read about that little adventure here.
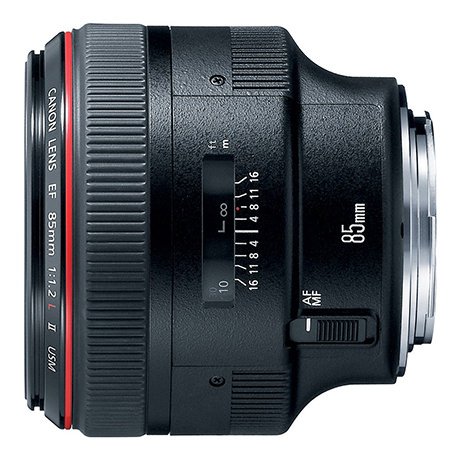
Bevan’s argues that the money we saved on purchasing a Canon 6D body rather than a Canon 5D, and the money saved on choosing a wide-angle Sigma lens over the Canon lens justifies the purchase of this portrait lens. He managed to get away with it this time.
We picked up the Canon 85mm second-hand in Hong Kong after searching high and low across the city’s camera stores. The Canon 85mm f/1.2L is the widest aperture lens Canon has in their ranks. What does this mean? It takes better photos at night time than the Canon 50mm and creates some incredible background blur.
In terms of remote picture-taking capabilities, this lens combined with the Canon 6D produces the best results for our couple photos. The narrow focus field means we simply stand in position then trigger the self timer.
The Canon 85mm does add significantly more weight (just over 1 kg) to our camera bag. For this reason, the lens tends to be the first to be left behind if we need to lose some weight to meet luggage restrictions or when we are travelling locally with the essentials (i.e. hiking).
Notes
Unfortunately, given the cost and the weight of this lens, we’ve decided to leave the Canon EF 85mm behind for our South America trip. We believe it would take some seriously stunning portraits but we cannot justify carrying it around for seven months and we hope that the Canon 50mm will be sufficient.
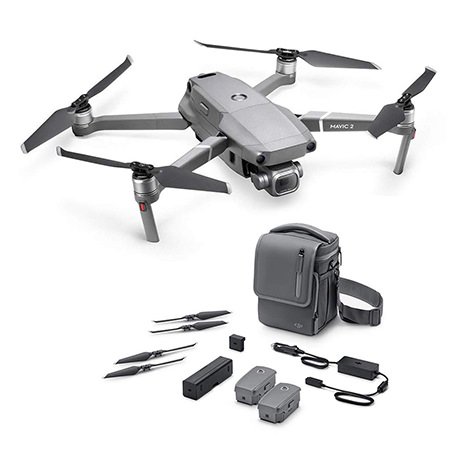
The DJI Mavic Pro 2 was a serious upgrade from our DJI Spark. Having already learned to fly a drone, we were ready to take off the ‘training wheels’ and launch higher and further than we had ever gone before.
The DJI Mavic Pro 2 has some seriously cool features, which you’d expect for anything ‘Pro’. It can ascend to a height of 500m and a range of 5,000m (although some countries do have drone restrictions so please ensure you research each country’s laws before travelling). We took full advantage of the drone’s range during our visit to the Whitsundays when some migrating whales passed by the beach.
As we have started to dabble in videography, the DJI Mavic Pro 2 also helps to create some cinematic footage for us. Jump over to our YouTube channel to check out the videos we’ve captured using the DJI Mavic Pro 2.
Advantages
Takes stunning landscape photos (records in RAW) and high definition video (4K: 3840×2160 24/25/30p)
Battery life is superior at 31 minutes. Plus if you purchase the Fly More Combo, you are given an additional two batteries for extended shooting capabilities.
Supremely lightweight and packs into our kit bag
Disadvantages
Will occasionally not pick up the GPS or Wi-FI
Doesn’t shoot so well in low light situations. You can fly your drone at night (again, please be mindful of local and federal laws and respecting other people’s privacy) but if capturing the last daylight, be prepared for some sub-par images.
Notes
We bought our drone whilst travelling in Malaysia, thinking it would save us some money. It didn’t and the experience ended up causing a lot of headaches. The drone turned out to be faulty and after some lengthy emails and What’s App phone calls, we fortunately received a replacement. We discovered upon our return to Australia that the drone couldn’t be replaced here under warranty because it had been purchased under a different jurisdiction. If warranties and easy customer service is important to you then we wouldn’t recommend buying your drone overseas to save a few dollars.
DJI have recently launched a smart controller which looks absolutely wicked. To shop that model, click here.
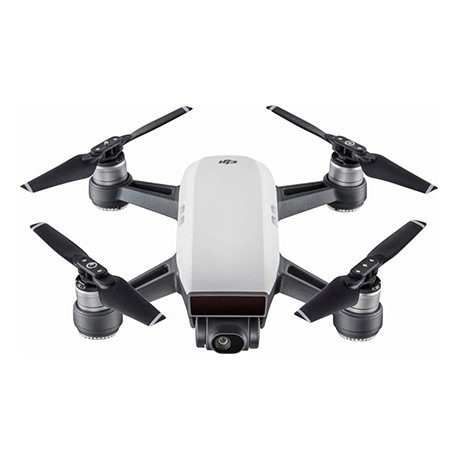
We owned a DJI Spark before upgrading to the DJI Mavic Pro 2. The Spark was a great little drone to learn the basics of flying a drone but we found that it had its limitations. For example, the Spark reaches a maximum altitude of 30m and has a battery life of 16 minutes. However, if you’re looking to take to the skies, this model snaps some great photos and is perfect for beginners interested in taking up drone photography.
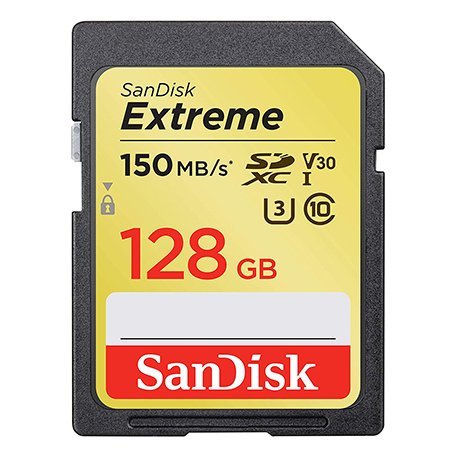
To ensure that your camera performs as expected, it is essential to have a memory card capable of capturing your images effectively and efficiently. We use Sandisk across all our cameras and always carry a backup (two in fact). There is a wide range of memory cards on offer from Sandisk and other brands but we choose to use the highest quality Sandisk cards simply because in our experience, they perform better and faster than its peers.
Applying filters is not restricted to Instagram or the processing and editing stage. You can also add filters to the front of your camera lens when shooting. We highly recommend including the following filters in your kit bag:
UV filter - The filter which is fixed to your lens 90% of the time. The UV filter protects your camera lens from dirt, dust, moisture, scratches and fingerprints. It is a lot cheaper to replace a filter than it is your lens.
Polarising filter - This filter shields your lens from glare or unwanted light reflecting off surfaces such as water or glass. Think of it as sunglasses for your camera. The filter also helps to enhance blue skies.
Neutral Density filter - A ND filter reduces the amount of light entering the lens which allows you to use a longer shutter speed or a wider aperture. This can offer increased creative flexibility (e.g. blurring movement of water in waterfalls and gushing rivers) or soften images snapped in harsh lighting.
During our 50-day European campervan trip, our previous tripod decided it was ready for retirement in Prague. We were about halfway through our trip and needed to replace it urgently.
We purchased our Genesis Tripod in Poland and since it came into our lives, it has supported us tremendously. As travel photographers, the three key factors for our tripod are stability, size and weight. Firstly, we needed to ensure that the tripod is strong and resilient to hold the weight of our camera and not get blown over too easily by gusty wind or a slight nudge by a passer by. Secondly, the tripod had to be compact as we generally take it in our carry-on luggage and lastly, we wanted the tripod to be rather light for the sake of our backs and to not exceed luggage restrictions at the airport. Other features such as height, ball head and locking capabilities may also be considered; these features were lower down our priority list.
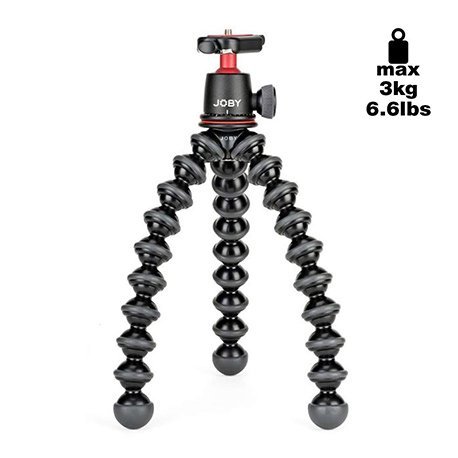
Before our South America trip, we purchased a Joby Gorilla Pod 3K Kit Bendable Tripod. The attraction of this tripod is its compact size as well as the bendable legs that could wrap around a non-flat surface. We’re hoping it will prove its worth!
We consider a tripod an absolute must for our camera bag particularly in the following three situations:
Low Lighting - We tend to shoot between 18-35mm focal lengths so when shutter speed drops below 1/30 of a second and there is insufficient light, we will pull out the tripod. This ensures that the camera is steady and stable (i.e. no shaky hands) and the sharpness of our images is maintained.
TIP: Set the timer so that when you click the shutter button to take your picture, the movement of your finger away from the camera does not disrupt the image being taken.
Bracketing - Following on from the above point, when lighting is uneven (e.g. shadows), we will try to employ the bracketing technique. The tripod ensures a solid base for capturing the frame several times at different exposures. We will hopefully capture one satisfactory image or rely on the post-production process.
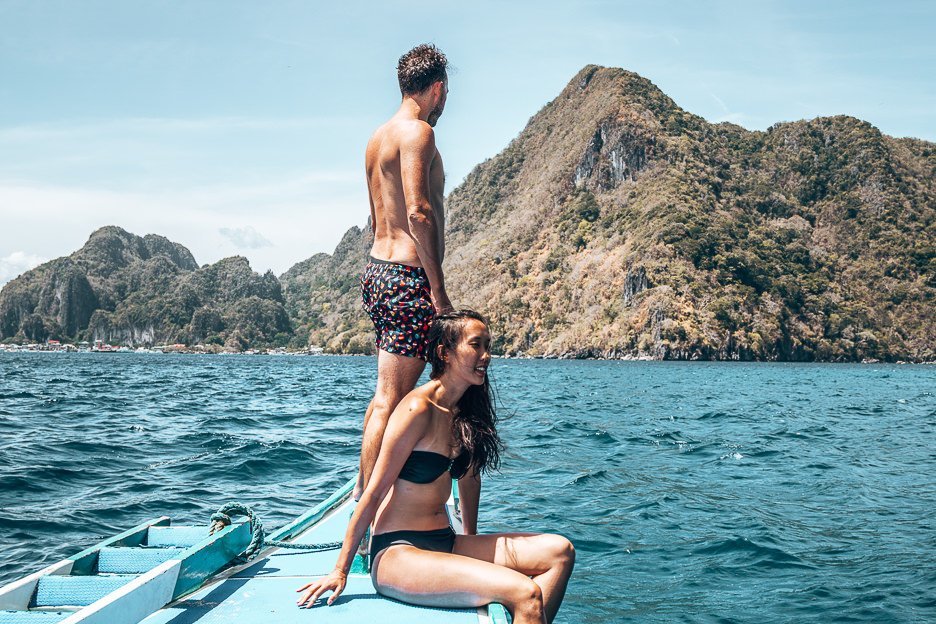
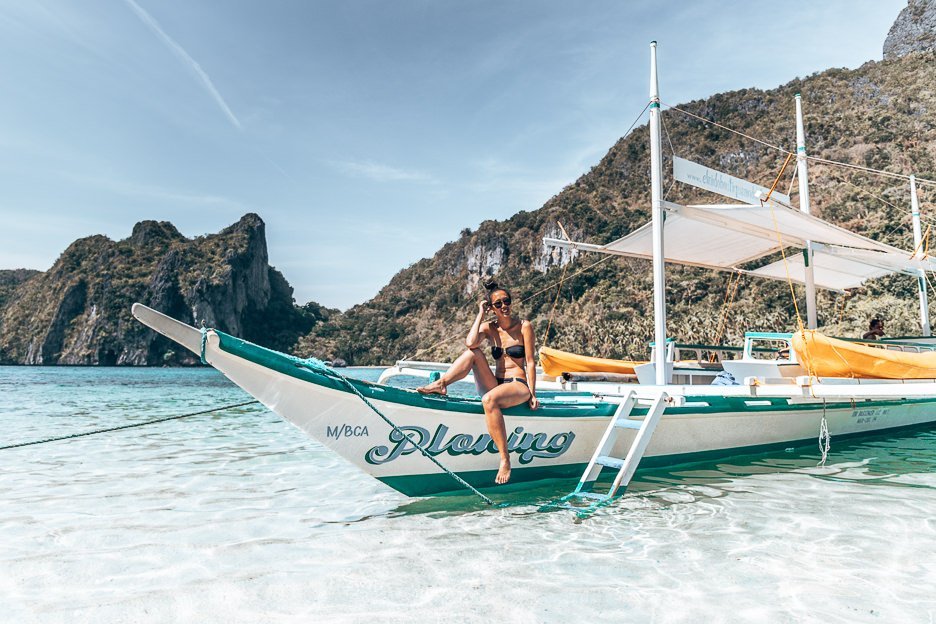
Couple Shots - when there is no one else around to take our picture, we set up the tripod and use the timer or remote shooting option. It is also particularly useful for when we are shooting video or to stabilise the image.
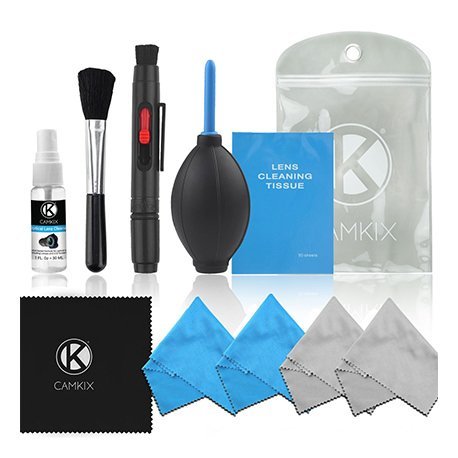
A cleaning kit is an important component of a photography kit. It guarantees that no dirty fingerprints or dust marks make their way onto your lens to ruin your shot. We clean our lenses regularly to ensure they are always looking their best (no 5 o’clock shadows here guys). Your cleaning kit should include (at a minimum):
Air blower
Dust brush
Lens cleaning solution
Microfibre cloth (always useful to have a few on hand)
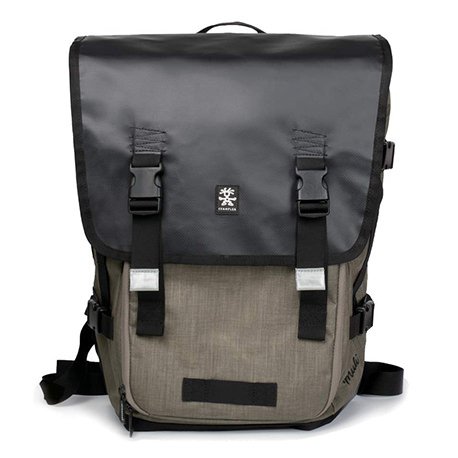
For the longest time, Bevan carried all the camera gear in an everyday backpack. Since adding all the aforementioned lenses and drone to our photography kit, it was necessary to upgrade so all our tech was suitably protected.
We went for practicality and style and thankfully Crumpler came to the rescue. The camera bag has enough storage for our Canon 6D, the four camera lens, our drone plus a laptop. All the camera gear tucks in nicely within adjustable velcro compartments and there are several smaller zipper pockets for our lens cleaning kit, spare batteries and extra SD memory cards. We can even slide a water bottle and the tripod on the outside.
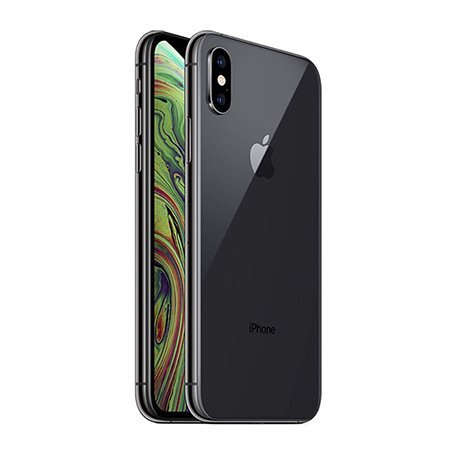
Both of us are iPhone advocates and use them constantly. We are guilty of taking pictures of our food pretty much before every meal (yes, we are those people in the cafes and restaurants). If shooting in poor light with your smartphone, make sure to spend a bit more time improving the image during post-production.
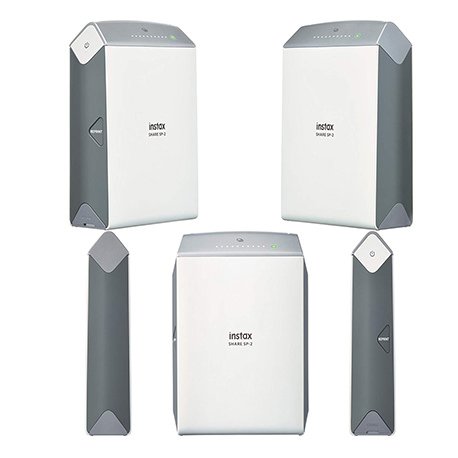
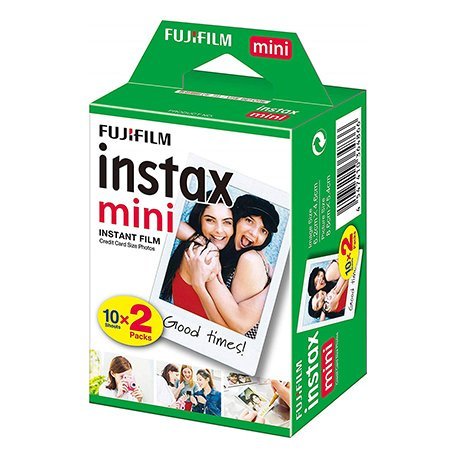
The small white box holds a roll of 10 sheets of exposure film and is connected via the Instax Share app on a smartphone. Import photos from your smartphone gallery, edit the image as you wish (you can add frames, text and filters with the app’s built-in features) and then click print. Photos print in just 10 seconds and with 320 DPI, the results are of a high quality. The image size measures 46 x 62 mm (W x H) on a printed sheet measuring 54 x 85 mm (W x H). Images can be printed vertically or horizontally and there is also a reprint button if you’d like to print the same photo more than once (sharing is caring!). A rechargeable battery via USB port means it can also be topped up on the go.
After all the hard work, we need a place to view, edit and then store our amazing images. For viewing and editing, we both use Macbooks: Bevan a Pro and Jasmine an Air.
Macbooks have an in-built Photos application. We import our photos from our SanDisk memory card into Photos, sort through the good from the bad and save them into arranged folders. Selected photos for the blog or social media are then processed through Lightroom (see below).
With the amount of photos that we take on each trip, we also need somewhere to store our pictures. Our laptops don’t have the storage capacity to store large volumes of RAW files so we enlist the help of our WD portable hard drive. This hard drive can store up to 2GB of photos on a device which is just a little bit bigger than a deck of cards. We take ours everywhere so that the memory cards can be cleared and we can back up our images. Make sure to always back up, back up, back up!
We’ve recently added a Seagate external hard drive to our bundle to store older images that can no longer fit on the portable hard drive. It has 4TB of storage (4,000 GB) which is more than enough storage for the two of us (if only all of Jas’ clothes could fit in the same space…)
The finishing touches to our images are applied using Adobe Creative Cloud. We use Adobe Photoshop and Adobe Lightroom to edit and enhance our photos. Over time, we have developed presets within Lightroom and these are used as a base to enhance our images. Once edited, we store our images in a catalogue in Lightroom; similar to a digital photo album. Photoshop allows us to resize our images and to edit images for our What To Pack section of the blog.